Tuesday, July 9, 2013

Paris Baguette Cafe

Paris Baguette Cafe in Wisma Atria

P wanted a meet up will all of us but only managed to get I and A together. She suggested we go to Paris Baguette, a Korean Bakery chain serving European food and since I had never been there before, it sounded enticing.

The cafe is located inside Wisma Atria and its hard to miss their neon sign. The cafe was packed - a good sign that the food must be good. We stood around for a little while because there was no place to sit. I took this time to take a peak at what they had. There was savoury breads and pastas, viennoiserie, cakes and puddings.

I let P pick the cakes she wanted to try. She picked a chocolate cake, strawberry shortcake, custard pudding. They looked delectable and the strawberry on the cake even had a face on it ! How cute ! (But slightly spooky also)

Chocolate Cake, Pudding and Strawberry Shortcake
The strawberry face !
Mango Pudding and Marron Cake

The cakes were light and fuffy. Good flavour. Thumbs up. For round two, P took a marron cake and mango pudding. The puddings are pre-made in miniature glass milk bottles with a lid. Very cute too. The marron cake was good too, great chestnut flavour and the pudding really yummy. Not too eggy, wobbly like jelly and a hint of the milk and vanilla still present. They layer their puddings. So there a there is a thin layer of caramelised syrup at the bottom, then the pudding and then a layer of the flavoured pudding.


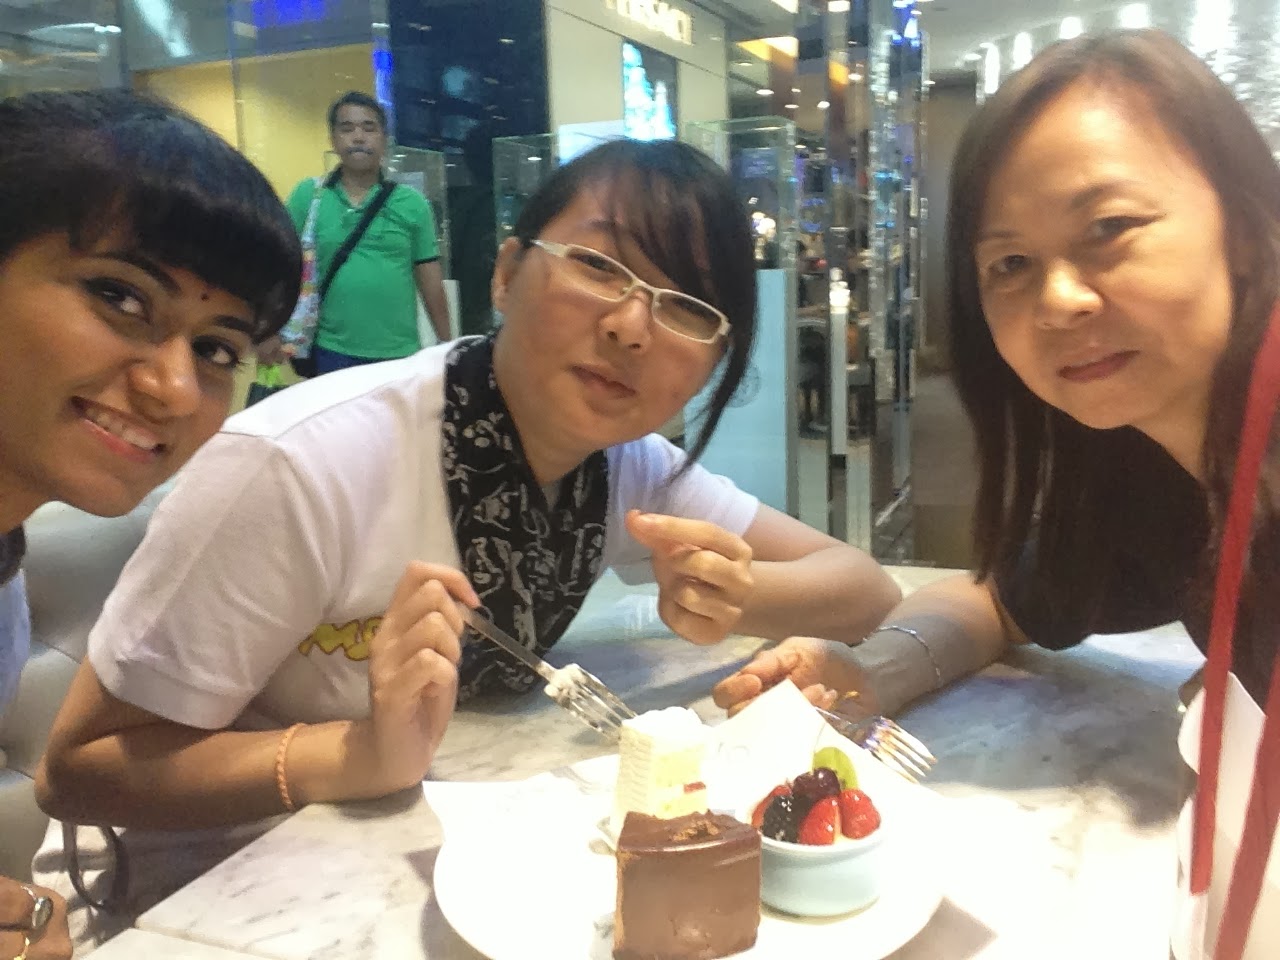
P and A
Us trying to take a selfie

We spent the evening taking small bites and bitching about our ex-colleagues. Priceless evening. =)

Cakes average S$7.50 a slice
Puddings average S$4.50 a bottle

Paris Baguette Cafe
435 Orchard Road
Wisma Atria Shopping Centre, 2nd Floor
T: 68362010

Labels: ,

Wednesday, April 10, 2013

Lemon Pound Cake with Lemon Buttercream


So I was asking my Dad what cake he would like for the weekend. I had just borrowed a book from the library and suggested that he had a look through. After sometime, Dad comes out of his study with his infamous tiny reading glasses (which he has since lost - tsk tsk tsk) picking two cake that require ... drumroll ...... alcohol - typical Dad ... really

One recipe was an orange cranberry combination that required Contrieau and the other Limoncello ! So I decided to try the lemon ones as I already had lemons at home.

The recipe was really really easy. So components are simple lemon pound cakes, a simple syrup, lemon curd and lemon butter cream. It is suggested that the process be spread over two days to allow for the cake to fully absorb the syrup and completely cool down. 


So day one was cake making, curd making and syrup making day. The cakes turned out beautifully with almost no domed surface - score !!! The lemon curd can be store-bought. I have a recipe that I always turn to - so I made that. The syrup required the alcohol which I just omitted.(The cake still tasted great)

Day two was buttercream making day. Simple beyond simple. Just beat butter and icing sugar till no lumps and mix in the lemon curd to get lemon buttercream. I think the next time I make it, I might double the recipe. The buttercream was just enough to fill and thinly cover the whole cake. Leftover curd became decor for the top !


I had lots of curd left so I filled the cake with the curd as well. If you look close, you can see the layer of curd above the layer of buttercream. Anyone care for a slice ?


Lemon Limoncello Cake with Lemon Buttercream adapted from Peggy Porchen

For the cake layers

200g softened unsalted butter200g golden caster sugar2 lemons - zest finely grated(unwaxed or washed well)4 medium eggs, lightly beaten200g self raising flourpinch of salt

Simple Syrup
150ml lemon juice (about 3 lemons' worth)
150g caster sugar
50ml Limoncello liqueur (I just skipped this)


Buttercream icing
80g softened unsalted butter
80g icing sugar, sifted
pinch of salt
40g lemon curd (I make mine from scratch)

Grease and baseline three  6 " baking pans and preheat the oven to 175'C.  

Cream the butter, lemon zest, salt and sugar together until pale and fluffy. It will take a good few minutes for the sugar to dissolve. 

Add the eggs a little at a time and beat until fully incorporated. Once the eggs are all incorporated, gently fold in the flour until it has just combined. 

Divide the mix evenly between the tins and level the surface. . 

Place the tins in the centre of your oven and bake for 15 - 20 minutes, until fragrant and golden. A skewer inserted into the middle should come out clean.


While the cake is baking make the sugar syrup. In a saucepan stir together the lemon juice and caster sugar. Bring to a boil and stir until the sugar is dissolved. Let cool for a few minutes and then stir in the limoncello (if using).
Once the cakes have been out of the oven for 10 minutes brush liberally with the sugar syrup. Once completely cool wrap in cling film and let rest for 24 hours.
To make the buttercream, cream the butter, icing sugar and salt until light and fluffy. Pour in the lemon curd and beat for 30 seconds.
To assemble, trim the sides and level each layer. Brush the tops with sugar syrup one more time and sandwich each layer with the buttercream. A useful guide would be to divide the icing into quaters. 1/4 of the icing for each layer (there will be two layers of buttercream inside the cake) and the remaining 1/2 of the icing for the outside. If you think there's not enough, then go ahead and quickly make another batch.
Enjoy !

Labels:

Thursday, April 4, 2013

Vegetarian Chocolate Cake


It's hard making cake for  my extended family as quite a few of them are vegetarian, some don't like creamy, some don't like the 'eggy' smell yada yada yada..

I'm still seraching for a good white vegetarian cake recipe but I think I found my vegetarian chocolate cake. It's really really good. Double thumbs up from all. The key to the cake I think is in the type of cocoa powder. Because there's so much cocoa powder in the recipe, it dominates the flavour of the cake which makes up for the lack of eggs. I use Valrhona. 

For Ryan's birthday, he wanted Chocolate Cake. So the construction of this cake came in four parts - the cake, the whipped chocolate cream, the chocolate ganache and chocolate glacage.

Ah prepping my kitchen space - where the magic happens! I love baking past midnight - the air is cooler and  everyone, well mostly everyone is asleep.


The cake begins with creaming the butter the sugar till pale and fluffy. Then in a separate bowl, the cocoa powder is mixed with water to create a paste. That is added to the butter mixture and then the reamining ingredients are added. 


The first time I made the cake, it was really crumbly and difficult to cut. So this time around to make my job easier, I baked into two 8" pans.


Whilst the cakes were baking, the next easy peasy step was the ganache. Just hot cream onto chocoalte chips and mix until combined with no lumps. For a more luxurious taste and glossy look, a knob of butter can be mixed into the room temperature ganache. Then its off to the refrigerator to harden and set.


I recently purchased ring moulds to make it easier for me to fill cakes. So naturally I bought 8" moulds for 8" pans - but no... 

Darn cake that came out from the 8" pans were smaller !!! Arghhhh - so out came my plastic wrap. Sigh - I need to go get 7" ring mould now. Sob Sob


I mixed in a little bit of nutella into the ganache as well to give it a hazelnut taste. So four layers of cake filled with ganache. Then covered the whole thing with chocolate whipped cream (ganache added to whipped cream), piped a border of ganache on the top and bottom and poured the chocolate glacage in the middle. 
Some decor after - et viola ! Happy Birthday Ryan !


Chocolate Vegetarian Cake :- adapted from a recipe from Taste Goblet

125 g softened unsalted butter 
1 cup fine castor sugar  
1 teaspoon vanilla essence

1/2 cup cocoa (Valrhona preferred)

1/2 cup hot water
1 cup buttermilk, at room temperature
1 3/4 cups cake flour
1 teaspoon baking powder
1 teaspoon bicarbonate of soda 
1 teaspoon of vinegar

Prepare two 8" baking pans by greasing it and lining the bottom with greaseproof paper. Preheat oven to 180'C.

Mix the cocoa in the hot water and let it cool. 

Cream butter and sugar until light and fluffy. Gradually the room temperature cocoa mixture to the butter/sugar mixture.

Sift the flour, baking powder, bicarbonate of soda and add it to the creamed mixture alternately with the buttermilk. Mix thoroughly. 

Add in the vinegar and vanilla essence and mix well.

Spoon the cake mixture into prepared pans and bake in a moderate oven (180 deg. C) for 40-50 minutes or until the top springs back when lightly pressed.

Let the cake to cool in its pan for 10 minutes. Then turn it out and allow to cool before icing. 

Labels:

Tuesday, March 26, 2013

Vanilla Bean Birthday Cake

So this month is my favourite month of the year because its my birthday month. So naturally, I give special attention to March babies. 

My Uncle C turns 55 this year and naturally I wanted to make him a cake. So I called up my cousin M and interrogated her on the flavours that he likes. Her only reply was that he likes anything vanilla.

Hmmm.. vanilla eh.. the first thoght that came to my mind was Adriano Zumbo's V8 Cake. I first saw it on the second season of Masterchef Australia. For the benefit of those who don't know who Zumbo is, he's an amazing patissier based in New South Wales, Australia. The V8 cake is basically an 8 layered and textured vanilla cake. It has layers like vanilla jelly, toasted vanilla brulee, vanilla daquoise and so on. 

So I searched for the recipe and oh my was this cake challenging. To begin with I had no access to ingredients such as miroir glaze, titanium dioxide, almond praline paste or pailette feuillitine (just to name a few). So instead of attempting all the layers, I decided to pick out components from the recipe. 

I decided on attempting the vanilla ganache to fill my layers with and vanilla creme chantilly to frost the cake. Mind you the whole thing is a min two day process.


So Monday night, I prepared the vanilla sheet cake. This was just a recipe that I always turn to for a simple white cake. In addition to the vanilla extract, I added vanilla beans as well for extra flavour.

Then whilst the cakes were baking in the oven, I quickly prepared the vanilla ganache and creme chantilly. Now the recipe for the vanilla ganache calls for 300g of white chocolate and when I went shopping for chocolate the day before, Cadbury Dream was 220g per block. So there I stood in the aisles of Cold Storage wondering weather I should get two blocks or just alter the recipe to accommodate the 220g. 

The creme chantilly called for thickened creme but I bought whipping cream instead and the final product (the next day) still whipped up well. Phew!


Can you see the specks of vanilla beans in the cake. It was heavily scented with Madagascan vanilla. Mmmmm .... 


Then came the vanilla ganache. Now when I took it out of the fridge, it was firm and held its shape. Then the more I started working with it, the more it started to melt. Arghhh once again my frustration with the Singapore heat. Sigh. I quickly filled the layers and popped it back into the fridge. But I can see the weight of the cake squeezing the ganache out. Moments like this I wish I had a blast freezer or cake ring... I'll invest in a cake ring.


Frosted the slightly cooled cake with the creme chantilly and piped rosettes all over it. It was still too hot for the frosting to hold its shape but it was 2am by then and I was like - I need to get this done.


Made smaller tasting pieces with the scraps. I tought it was too sweet and Mom thought it was perfect. Lets see what my Uncle says. 


Components of the Cake :- recipes adapted from Adriano Zumbo's V8 Cake

Vanilla Bean Cake
Any white sheet cake with vanilla beans added to it

Vanilla ganache
300g white couverture chocolate
185g thickened cream
2 tsp vanilla extract
1/2 vanilla bean, split, seeds scraped
95g unsalted butter, softened


Vanilla crème chantilly
4g gold strength gelatine leaves
590g thickened cream
1 vanilla bean, seeds scraped
175g caster sugar
24g cold water


To make the vanilla ganache, heat the cream, extract and vanilla seeds into a saucepan. Bring to to boil and pour over white chocolate. Mix all until combined and let it cool to room temperature. Whisk in the butter and refrigerate till needed.


To make the vanilla crème chantilly, cut gelatine into small squares, soak in the cold water. Place cream, vanilla and sugar in a saucepan and bring to the boil. Remove from the heat and allow to cool to 70-80°C, and then stir through the gelatine and water mixture until dissolved. Place in a container, cover the surface with cling wrap and place in the fridge.

Labels:

Sunday, March 10, 2013

Pandan Chiffon Cake


So I was food blogging and saw a recipe for Pandan Chiffon Cake. I had bought my Chiffon Cake tin yonkers ago at Sun Lik Trading Pte Ltd http://sunliktrading.com/ and never really had a recipe to try it out. Recipe called for pandan juice so I did some errands at the mall and bought my pandan leaves together with a few other groceries that you really don't need but just bought it anyways because you were there. Haiz. 


So I started my prep on Sunday. Step 1 was to extract the juice from the pandan leaves. One way was to pound the life out of it using a mortar and pestle. Wasn't feeling particularly strong that day and therefore opted to blitz it with some water in my sturdy Preethi blender. Squeezed out all the fragrant juice and et voila 1/2 cup of pandan juice. 


Then I mixed the egg yolks, oil, pandan juice, suagr,  flour a baking soda into an emulsion. In a separate bowl I whisked the egg whites to soft peaks, added sugar and continued whisking to achieve stiff glossy peaks. Then began folding the egg whites into the emulsion and it was a total pain ! The egg whites had to be folded in gently so as to not lose all the air. I kept folding and folding and most of the egg whites did get incorporated sans for a few small lumps that were really beginning to annoy me. Eventually I reached a point where I went enough is enough and poured the batter into the cake tin. Baked for 55 mins and the fragrance of the pandan filled the whole house. Dad was particularly excited as tea time was just around the corner as well.


Dad's verdict was that the cake was fluffy and moist but needed more pandan flavour. For me it was 'wet'  well actually moist but I guess that's because I was expecting the drier store bought versions. Aunt loved it too.


Pandan Chiffon Cake  Recipe adapted from pickyin.blogspot.sg


For the 94ml Pandan leaf juice:
10-12 pieces pandan leaves 
3-4 tablespoons water
2 tablespoons coconut milk (optional) 

For the flour batter:
135gm self-rising flour
75gm castor sugar
6 egg yolks
4.5 tablespoon corn oil
¼ tablespoon baking of soda

For the meringue:
6 egg whites
75gm castor sugar
½ tablespoon cream of tartar

Pre-heat oven to 170°C and position a wire rack at the lower third rack. Prepare a clean 23cm chiffon cake tin, do not grease!

Wash and cut the spears of pandan leaves into ½ inch pieces. Place into a blender and add 3 tablespoons of the water. Blend to form a thick paste, add another tablespoon of water if it is difficult to blend. Remove and squeeze out all the liquid from the paste through a fine strainer. You can either add some coconut milk, which will go nicely with the pandan  flavor, or add more water.

Sift the flour and baking soda into a small bowl. In a separate large mixing bowl, whisk the egg yolks with the corn oil to form an emulsion. Add the pandan leaf juice or pandan leaf juice plus coconut milk mixture. Mix well before adding the sugar and whisk till sugar has dissolved. Add sifted dry ingredients and whisk well into a smooth batter, there should be no lumps. Set aside.

Whisk together the egg whites and cream of tartar. Once the egg whites begin to foam, start adding the sugar gradually in 3 additions. Beat till the meringue is smooth and glossy, with stiff peaks. Be careful not to overbeat the egg whites.

Immediately stir in approximately 1/3 of the meringue into the batter. With a flexible rubber or silicon spatula, fold in the meringue gently and mix well. Once a roughly homogenous mixture is achieved, add the rest of the meringue and repeat the gentle, light-handed folding process till the cake batter is well combined. Scoop from the bottom of the bowl to ensure no meringue or flour batter is left unmixed. Do not beat or overwork the batter as this will knock out the air you've put into the meringue.

Pour the cake mixture into the cake tin. Using your spatula, dip it into the batter right to the bottom and make circles around the tin twice. This is to remove any large air bubbles possibly trapped while pouring in the cake batter.

Bake at 170°C for 10 minutes. Lower the temperature to 160°C and bake for another 45 to 50 minutes or until cake is done. The cake tester should come out clean. Don't fret if the top of your cake cracks a little, this is normal.

Remove the cake from the oven and immediately overturn it to cool completely, up to 2 hours. Release the cake by running a sharp, thin knife along the sides of the cake tin and subsequently the bottom of the tube. 

Cake keeps well chilled in an airtight container or cling wrapped up to five days (three if using coconut milk).

Labels: